Die nasse Wand
Dinge, auf die man verzichten kann – vor allem an einem Sonntag, Ausgabe #323: Wasser, das durch die Wand in den Keller läuft. Aber fangen wir von vorne an: Als der Maler endlich fertig war und wir Ende Mai mit unseren Arbeiten anfingen, fiel Lysanda plötzlich etwas auf: Im Waschraum hatte sich auf einer relativ großen Fläche die Farbe an der Außenwand gelöst. Bei genauerem Hinsehen war dann auch der Salpeter sichtbar. Oder auf Hochdeutsch: Scheiße, die Wand ist nass! Und zwar an der Stelle, an der das neue Abwasserrohr seit Frühling 2020 das Haus verlässt. Ebenfalls gut erkennbar: Unter dem Abwasserrohr feucht, darüber nichts.
Die Vermutung war entsprechend recht schnell, dass die Tiefbaufirma auf irgendeine Art und Weise beim Abdichten der Mauer Mist gebaut hatte. Spoiler: Die Vermutung sollte sich bestätigen. Ich hab’ dann entsprechend direkt dort angerufen und für den 20.6. einen Termin ausgemacht. Erst so spät, weil die wegen Urlaubszeit kein Personal hatten und bislang war ja „nur” die Wand am feucht werden.
Beschleunigte Maßnahmen
Am Ende sollte es dann doch nicht so lange dauern, denn am 5.6. kam bei uns eine kurzer aber heftiger Regenschauer runter. Lysanda schlug mir vor doch mal runter in den Keller zu gehen und nach dem Rechten zu sehen. Eine gute Empfehlung, denn aus zwei Löchern rechts vom Abwasserrohr floss nun das Wasser raus. Haben es zum Glück relativ früh gemerkt (war erst dabei sich im Raum zu verteilen) und der Wolkenbruch war auch schnell wieder vorbei. Aber es war schon genug, um am Ende den Waschsauger zweimal zu füllen. Habe ich das Ding eigentlich schon oft genug gelobt? Erst zwei Jahre im Haus und bereits mehrfach (auslaufende Waschmaschine, auslaufende Heizung, auslaufende Außenwand) extrem hilfreich gewesen. Wenn ich das alles immer nur mit Handtüchern und Kram hätte wegmachen müssen…
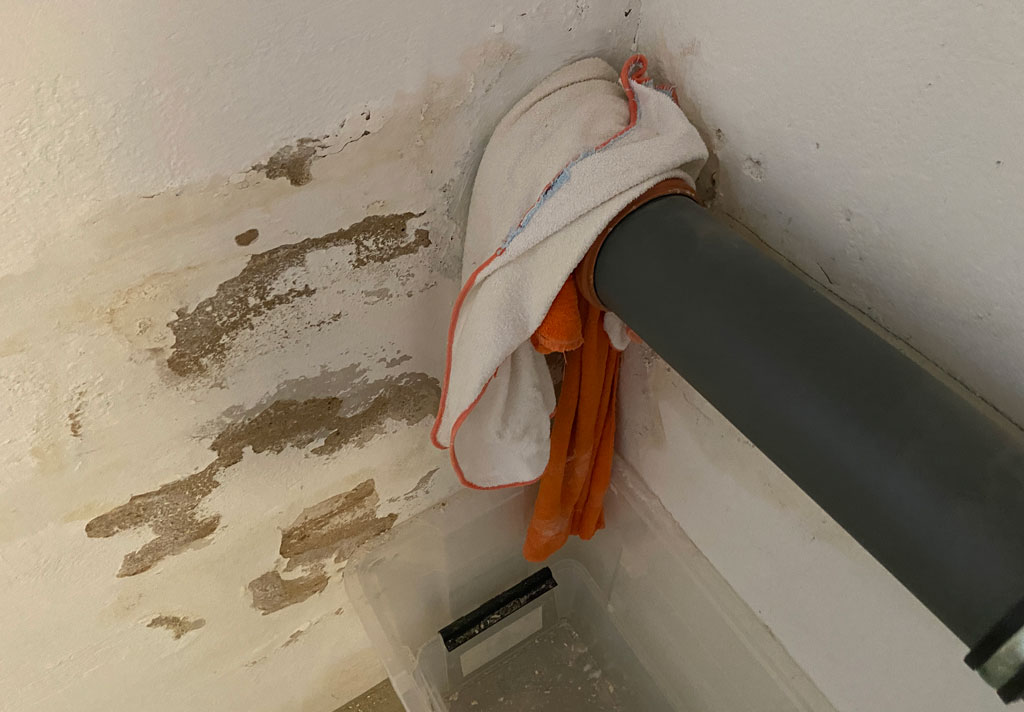
Hier läuft Wasser
Wir haben dann zwar fix ein kleines Provisorium mit leeren Plastikkisten und Handtüchern installiert (=Handtücher nehmen das ankommende Wasser auf und geben es dann dank der Schwerkraft in die Kisten ab). Es war aber klar, dass wir nicht noch drei Wochen warten wollen bis sich die Situation überhaupt mal jemand anschaut – vom Beheben war da noch gar keine Rede. Nach dem Feiertag also direkt nochmal angerufen und klar gemacht, dass da früher was passieren sollte. Gesagt getan: Tags darauf kam der Chef vorbei, Donnerstagabend dann der Anruf zur Terminvereinbarung und Freitag um 10 Uhr standen zwei Arbeiter vor der Haustür. Sehr gut.
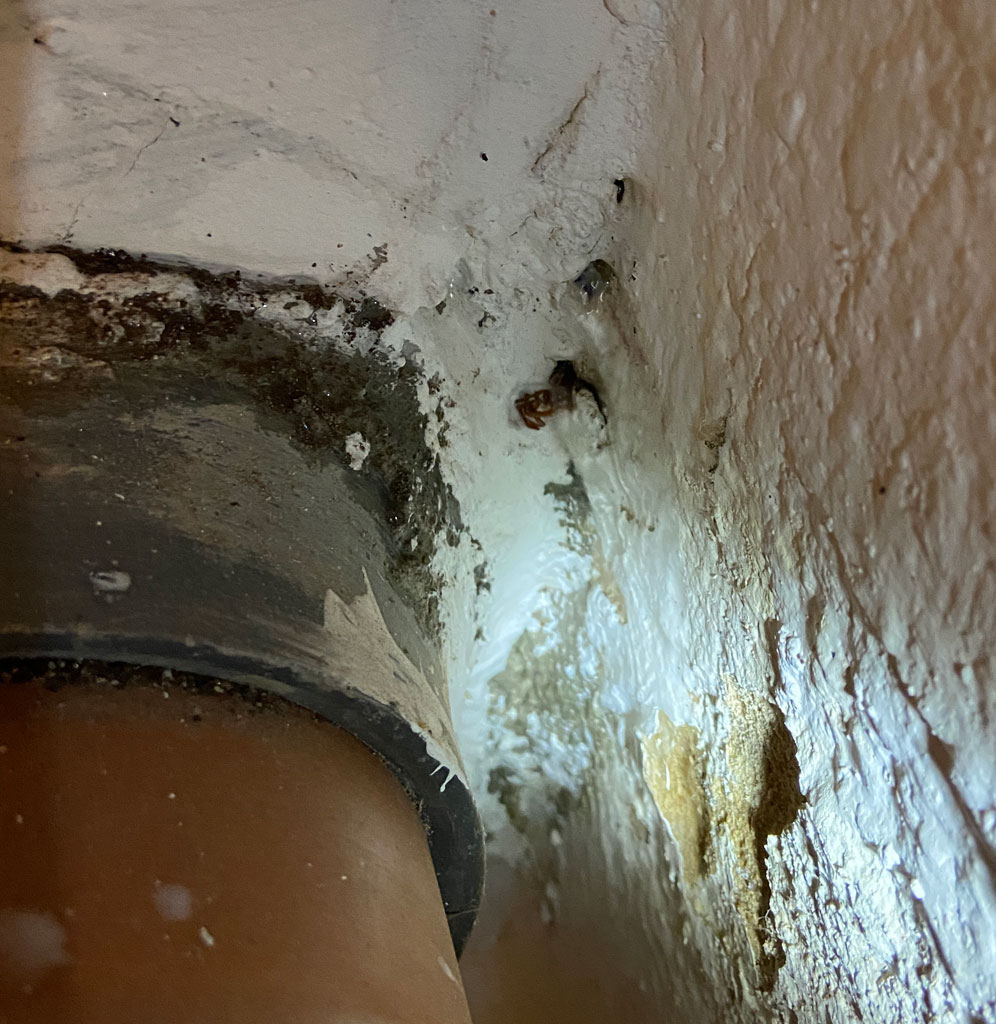
Der Übeltäter
Ich habe den beiden kurz die Fotos vom offenen Graben von damals gezeigt. Anschließend haben sie die Stelle wieder aufgemacht. Auf den ersten Blick war nichts zu sehen. Die Dichtungsringe waren überall drin und anders als von ihnen vermutet (schlechtes Zeichen!), wurde anscheinend auch der Zement nicht vergessen. Entsprechend war trotz halboffenem Graben irgendwie unklar, wo das Problem liegt. Während ich den Schlauch in den Keller schaffte für einen Spültest, grub der Arbeiter aber tiefer, um quasi das gesamte Rohr freizulegen. Und prompt war das Problem gefunden: Die Kollegen von damals hatten zwar pflichtschuldig den (wasserundurchlässigen) Zement ausgepackt, aber damit warum auch immer nur die Oberseite des Rohrs bedeckt. Untendrunter war abseits der Noppenfolie keinerlei Schutz vorhanden. So hat sich über die letzten zwei Jahre bei jedem Regen langsam aber sicher das Wasser von dort in die Außenwand und nun eben durchgeschafft. *stöhn*
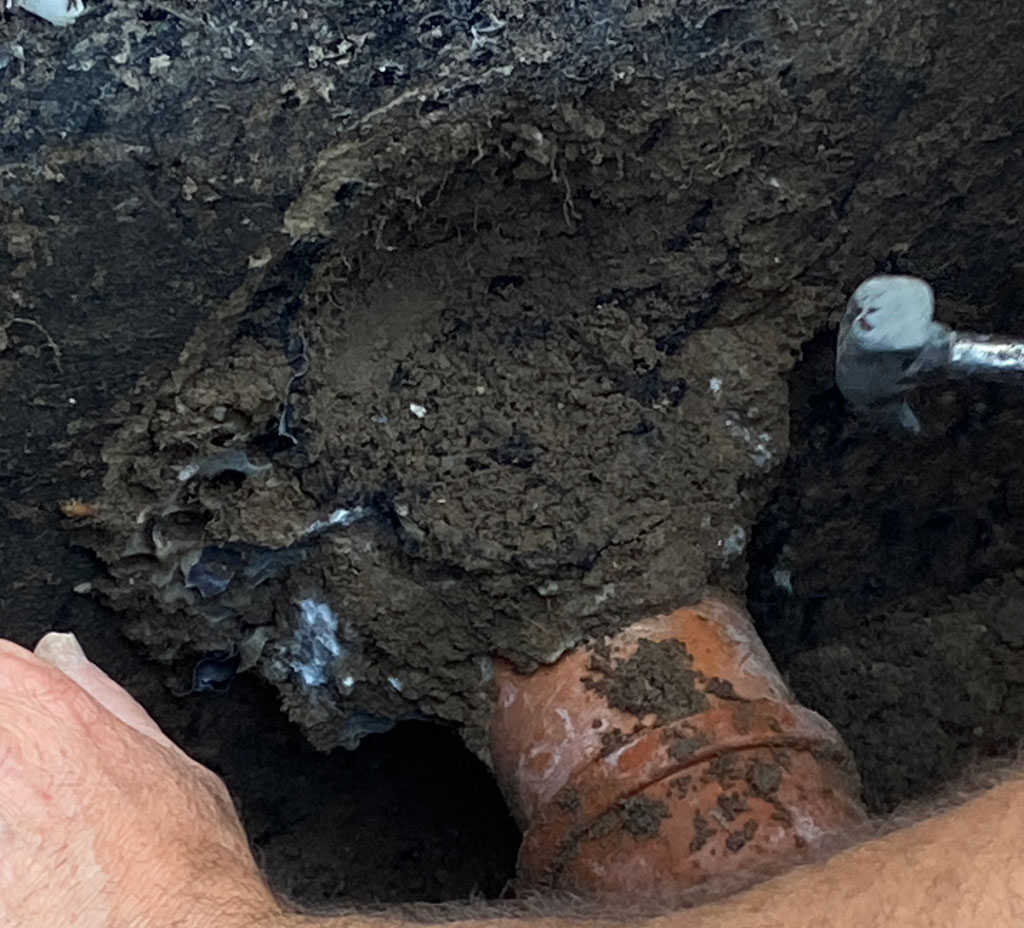
Oben hui, unten pfui
Joa… muss man nicht haben. Aber immerhin wurde das Problem zügig gefunden und die Behebung war ebenfalls kein großer Akt. Ungefähr eine Stunde, dann war die Sache erledigt und die Wand sollte wieder dicht sein. Einer der Arbeiter hat zumindest vollmundig versprochen, dass das jetzt 100 Jahre hält. Mal schauen ![]() . Gleichzeitig hoffe ich, dass sie an der anderen Hauswand (2. Abwasserrohr, Einführung von Wasser und Gas) sorgfältiger gearbeitet wurde und da nicht demnächst noch weißer Flaum an der Innenwand auftaucht. Jetzt heißt es erstmal warten bis die Wand durchgetrocknet ist und dann den Putz/Farbe erneuern. Aufgrund der aktuellen Außentemperaturen aber sicherlich nichts, was mehrere Monate dauern wird.
. Gleichzeitig hoffe ich, dass sie an der anderen Hauswand (2. Abwasserrohr, Einführung von Wasser und Gas) sorgfältiger gearbeitet wurde und da nicht demnächst noch weißer Flaum an der Innenwand auftaucht. Jetzt heißt es erstmal warten bis die Wand durchgetrocknet ist und dann den Putz/Farbe erneuern. Aufgrund der aktuellen Außentemperaturen aber sicherlich nichts, was mehrere Monate dauern wird.
Und falls ihr euch fragt, wer diesen Sondereinsatz bezahlt: Der Tiefbauer. Wir sind noch voll in der Gewährleistung (für diese Art von Arbeit min. 4 Jahre) und es ist mehr als offensichtlich, dass seine Mitarbeiter das verbockt haben. Da gibt es (hoffentlich) keine Diskussion. Und in diesem Fall würde ich selbst bei abgelaufener Gewährleistung mit ihm in die Bütt gehen… kann ja nicht angehen sowas.
Stinkige Teile
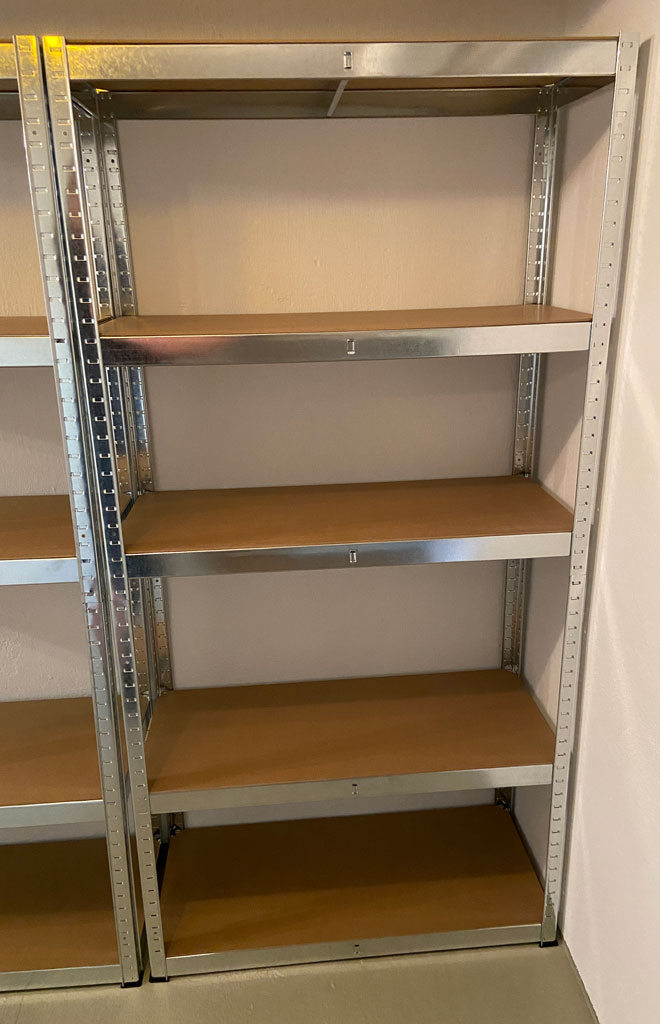
Das fertige Regal
Aber auch wir waren weiter fleißig – mit dem Ergebnis, dass es aktuell im Keller irgendwie stark mieft. Keine Ahnung was für ein Holz das ist oder mit was es bearbeitet wurde, aber holla die Waldfee das ist echt heftig. Und zwar haben wir im Öltankraum die ersten Regale aufgebaut. Nichts Besonderes. Einfach nur vier Schwerlastregale aus dem Baumarkt für insgesamt um die 100€. Im Prinzip dieses* Modell. Allerdings fiel dieses Mal anders als im Werkraum nicht die Wahl auf die Regale von toom. Kein besonderer Grund außer, dass toom anscheinend in der Zwischenzeit die Preise um 10€ erhöht hat.
Allerdings muss ich sagen, dass das andere Modell (gibt es von diversen Firmen) auch wesentlich angenehmer in Bezug auf das Zusammenbauen war – nachdem wir es verstanden hatten. Netterweise hat uns der Verkäufer nämlich per E-Mail eine Anleitung geschickt, die wir statt der in der Verpackung nehmen sollten. Pflichtbewusst habe ich das natürlich getan und mir nur Probleme damit eingehandelt. Ich hatte nämlich Teile, die irgendwie in der Anleitung nicht vorkamen. Also haben wir uns dann doch mal die in der Verpackung angeschaut und siehe da: Die passte irgendwie wesentlich besser zu unserem Produkt ![]() .
.
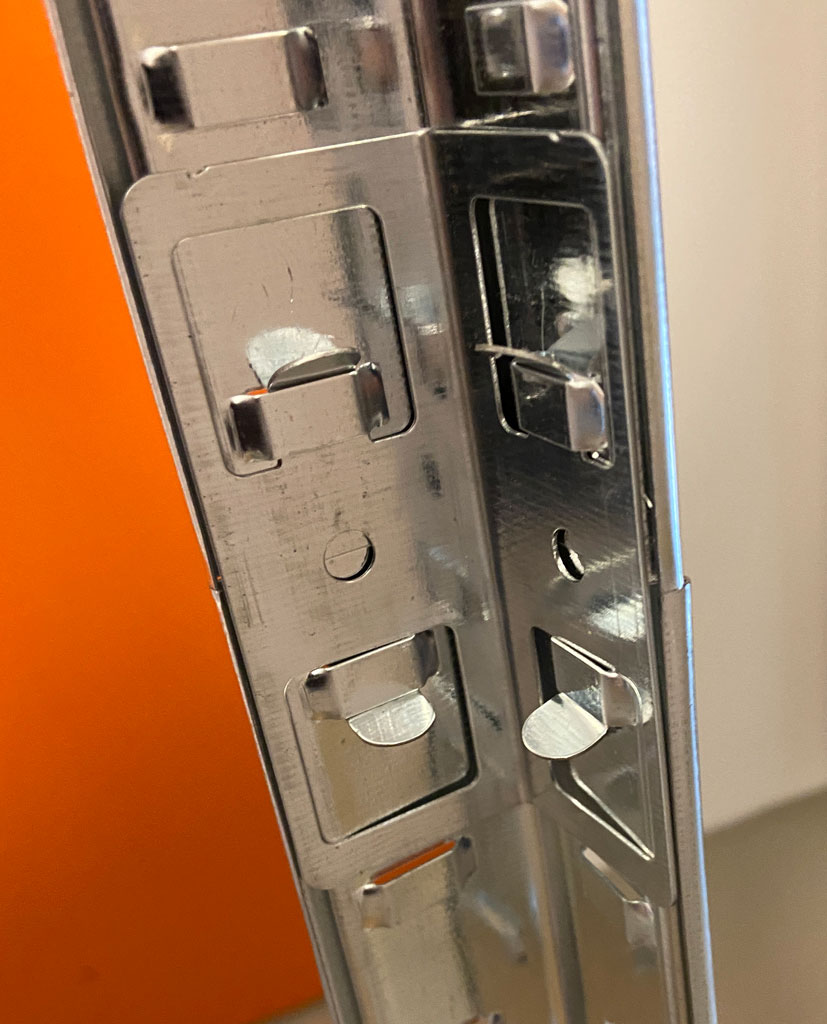
Besagte Laschen
Die zwei Hauptunterschiede zwischen den neuen und den toom-Regalen (die es ebenfalls in gleicher Form auch woanders gibt) sind wie die Bretter im Regal liegen und – viel wichtiger – wie die Bauteile zusammengesteckt werden. Während im aktuellen Modell die Bretter einfach nur auf dem Rahmen aufliegen, sind sie im toom-Modell eingelassen. Das macht sie gefühlt etwas stabiler und vertrauenserweckender obwohl beide Regale auf 175kg pro Fach ausgelegt sind. Beim Zusammenstecken setzt das toom-Regal hingegen auf komische Nasen, die ihr in die Öffnungen in den Stangen reinschlagen müsst. Das ist zwar gefühlt stabiler aber – wie ich damals schon geschrieben hatte – extrem anstrengend und wetterabhängig beim Zusammenbau. Das neue hat hingegen einfach Laschen und Ösen, die ihr ineinandersteckt und 2-3mal mit dem Gummihammer draufhaut, um sie fest zu machen. Anschließend noch mit der Zange an ein paar Stellen umknicken und schon passts. Wirkt im ersten Moment ziemlich wackelig aber sobald alles drin und dran ist, stehen sie trotzdem genauso gut wie die toom-Regale und erscheinen stabil.
Nur der Gestank… der war bei den toom-Regalen definitiv nicht in dieser Form vorhanden. Das lässt sich gar nicht beschreiben und ich hoffe, dass gibt sich bald wieder. Fast nicht zum Aushalten und ein derber Minuspunkt für dieses Modell. Hab’ für das letzte Regal übrigens ~30min gebraucht. Das erste hat noch 1 1/2 Stunden verschlungen. Bei Regal Nr. 2 habe ich hingegen am Finger auf ca. 1cm Länge die oberste Hautschicht abgeschabt. Merke: Wenn in der Anleitung steht, dass man Handschuhe anziehen sollte, dann zieht gefälligst Handschuhe an!
Epilog
Unser nächster Schritt im Keller ist nun meine alte Garderobe wieder aufzuhängen (für Sommer/Winter-Wechsel) und die Bauteile für das Regal im Waschraum zu kaufen. Da dort ja das Abwasserrohr quer über die Wand verläuft, können wir keine normalen Stehregale hinstellen. Stattdessen werden wir uns hier ein Wandregal zusammenbauen wie im Kabuff. Und dann geht’s endlich ans Aufräumen! Aber wie immer: Ich halte euch natürlich auf dem Laufenden ![]() .
.